Since I’m not interested in market trends, I’ve had quite a delay in making the first iPhone post, that everyone else did in day 1. See the article content, pass the image below.
The iPhone was first announced on January, 2007. A period of incredible mobile market changes quickly followed. Customers were getting anxious of putting their hands on this hand-held, even if the competitors (Microsoft’s Pocket PCs or Nokia’s Symbian devices) have long provided already much better devices (first WLAN Pocket PC was the HTC Blue Angel released in 2004, first 3G device the HTC Universal released in 2005). Still, I must admit that Apple did an astonishing marketing job, since practically overnight they were capable of making everyone aware of their new device, and yes, make them buy it. Anyhow, more on this in another article.
For this introductory article I would like to show a few basic things:
1) How to connect your iPhone to your desktop PC and how to update the iPhone firmware (You will loose the activated iphone status!)
2) How to downgrade the iPhone 3G from 3.1 to 3.0
3) How to activate the iPhone 3G 3.0 (jailbreak)
4) View iPhone filesystem in total commander
5) Do screen captures of your iPhone 3G
Connect the iPhone to your Windows PC
Using the USB Cable you can connect the iPhone 3G to your Windows PC. First time I did this, it was automatically installed as a “Digital camera”, thus I was able to view the pictures stored inside using the “Microsoft Camera and Scanner Wizard”.
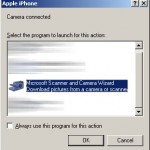
The wizard allows you to work with your device directly, in Explorer, and for that you’ll need to click “advanced users only”:
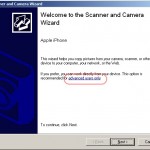
That’s about it you can do with the Microsoft Camera wizard. To extend the desktop sync functionality, you’ll need iTunes. Get it from here, and install it on your PC.
[installing itunes]
Must say iTunes looks good. Besides the multimedia aspect, it offers easy and direct access to your iPhone. After the first few configuration steps, I get a window showing some of my iPhone’s details.
With a simple click, I can update the Firmware, from 3.0 to 3.1 (latest available at this time).
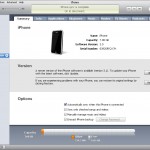
Must say this looks like the easiest ROM upgrade system I’ve even seen (counting WinMob, Symbian, Android or Blackberry). So let’s give it a try, and see how firmware 3.1 looks like. I’ve also found this Apple page you might be interested in.
[updating firmware]
After pressing [UPDATE], first few steps where informative, showing agreements, and the new 3.1 release notes.
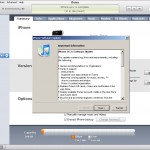
Next, the iTunes downloaded the firmware file itself. Locally the file can be found in:
c:\Documents and Settings\[Username]\Application Data\Apple Computer\iTunes\iPhone Software Updates\iPhone1,2_3.1_7C144_Restore.ipsw
The firmware file is actually a 253MB zip file, so you can change its extension to ZIP and view the content

As I was saying the upgrade process is fully automatic, leaving little space for user error (unless you’re going to unplug the data cable while upgrading, or to turn off your PC, things that you shouldn’t do, but I guess you already know that).
During the upgrade (which lasted ~ 20minutes) the iPhone’s screen cotent changed, to reflect the upgrade process progress.
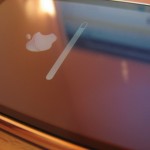
So now that the firmware upgrade is done, I’ve… just got a message about the phone not being activated and the SIM card not supported, and all I can do with the phone is … emergency dial. Great! I really love locked firmwares. Great job Apple! Not!
[a few hours later]
It seems like I’m stuck with 3.1 . There’s a way of downgrading to 3.0 but only the OS ROM image without the Radio. So I won’t be able to use the phone network but at least I’ll be able to use the other functions.
Downgrade iPhone 3G from 3.1 to 3.0
1. Get iTunes 8.2
2. Get the 3.0 Firmware:
Iphone 2G: http://appldnld.apple.com.edgesuite.net/content.info.apple.com/iPhone/061-6580.20090617.XsP76/iPhone1,1_3.0_7A341_Restore.ipsw
Iphone 3G: http://appldnld.apple.com.edgesuite.net/content.info.apple.com/iPhone/061-6578.20090617.VfgtU/iPhone1,2_3.0_7A341_Restore.ipsw
Iphone 3GS: http://appldnld.apple.com.edgesuite.net/content.info.apple.com/iPhone/061-6582.20090617.LlI87/iPhone2,1_3.0_7A341_Restore.ipsw
3. Put the iPhone in DFU mode:
* Connect your iPhone to your computer.
* Turn iPhone off.
* Hold power and home together for a few seconds.
* Release power but keep holding home until the computers beeps (observed on a PC) as a USB device is recognized.
* A few seconds later iTunes should detect the iPhone.
* If the Restore Logo is present on the screen, you are in Recovery Mode, not DFU and need to retry.
4. Press shift and click the Restore button. Instead of doing the restore with latest firmware, a browse dialog pops up where you can select the Firmware file. I’ve got a iPhone 3G here so I’ve selected iPhone1,2_3.0_7A341_Restore.ipsw.
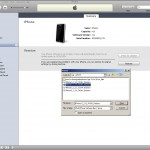
5. Ignore error 1015 at the end, and press OK
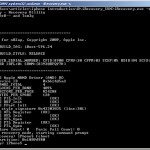
6. Download iRecovery. Extract the zip content, and start a windows command prompt (cmd), go to the iRecovery.exe folder and launch it with -s parameter: iRecovery.exe -s
(You might need to unplug/replug the USB Cable before this would actually work)
7. After iRecovery connected to your device, type the following command:
fsboot
Here’s how it should look:
8. After restarting the iPhone 3G, I get “Emergency calls only” and need to reactivate the iPhone 3G via iTunes, or:
How to activate the iPhone 3G 3.0 (jailbreak)
1. Download redsn0w 0.8 for Windows:
http://www.mediafire.com/download.php?wm2zznzonzf (mirror)
http://thebigboss.org/hostedfiles/redsn0w-win_0.8.zip (mirror)
(the links my not last very long, so you might need to use search engines to locate this file)
2.Unzip file, and start redsn0w.exe . Press Browse and select the 3.0 firmware (iPhone1,2_3.0_7A341_Restore.ipsw)
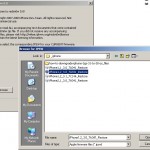
3. You should get “IPSW successfully identified” message. Press Next.
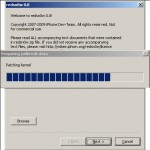
4. Select both Cydia and Icy. Press Next
5. Turn the iPhone off (and make sure it is plugged to PC via usb cable). Press Next
6. Follow the onscreen instructions to enter DFU mode (you already did that before).
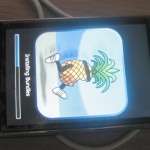
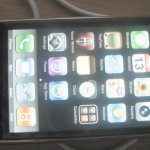
7. If DFU was ok, the process continues automatically and the iPhone shows some colorful images indicating the progress. Press Finish in the redsn0w interface, and wait until the iPhone 3G completes the update – should be straight forward.
 |
 |
Related online resources:
http://www.blogsdna.com/3911/how-to-downgrade-iphone-3gs-31-to-30-os.htm
http://www.ihackintosh.com/2009/09/how-to-downgrade-iphone-os-3-1-to-3-0-for-iphone-2g-3g-3gs/
http://www.ghacks.net/2007/10/01/downgrading-iphone-firmware/
http://www.ihackintosh.com/2009/07/download-redsn0w-08-to-jailbreak-iphone-3gs/
http://www.technobuzz.net/jailbreak-iphone-3-0-1-with-redsn0w/
Total commander iPhone plugin
If your using Total Commander, then there’s a plugin for it, that makes browsing the iPhone filesystem easier. Read more on that here and here. You can also download the plugin directly.
To use it, start iTunes, and make sure it sees the iPhone. Then in Total Commander, double click the plugin icon.
Alternativelly you can use the iPhoneNet plugin. Direct link here.
A neat tool, you can easily access (read/write) the files on your iPhone 3G.
Do iPhone 3G Screen Captures
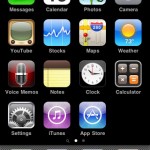
This one’s simple. Hold the power button and quickly press the Home button. It’s saved in “Photos”=>Camera Roll.
If you’re using the T-Pot plugin for Total commander, you can see the photos in the file system in:
\\\T-PoT\private\var\mobile\Media\DCIM\100APPLE\
See how it looks:

And the screenshot , 320×480 screen resolution:
Next articles will discuss first steps into programming the iPhone.
Radu Motisan



Pingback: iPhone Handsets » Blog Archive » PocketMagic » Apple iPhone 3G - introduction
Pingback: PocketMagic » Apple iPhone 3G - introduction | Car |
Iphone 3G have the best features among all the phones that i have owned. the iPhone is also very classy and stylish.
My 3GS 16GB broke afterjust 4 weeks. Battery died. Fun. Took Apple weeks to get my new phone.
you missunderstood….stated jailbreak and unlock is Always Free of charge..
. but, if you select for A person ELSE To perform THE Perform For yourself (in case you will not know anything about personal computers) then they could demand revenue for their time,and so on..
..however the software would be absolutely free to anybody to down load and do it themselves….
..